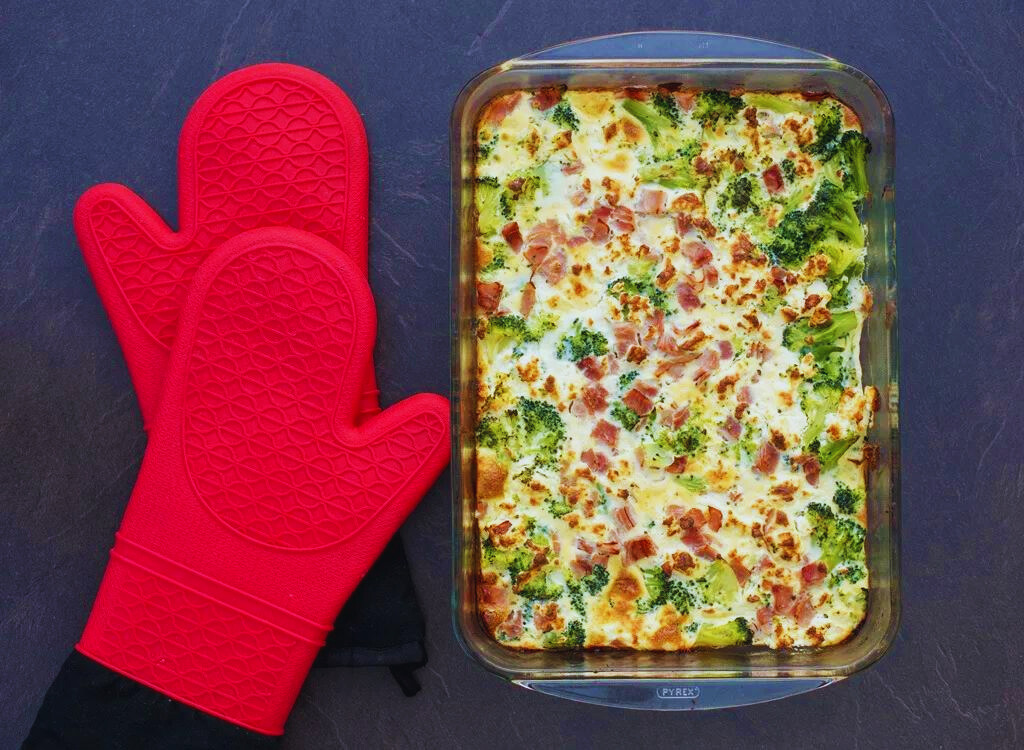
Introduction
Welcome to the ultimate guide on fixing the common kitchen woe—soupy green bean casserole. If you’ve ever found yourself disappointed with a watery concoction instead of the creamy delight you envisioned, fear not! In this article, we’ll navigate through practical solutions and insider tips to rescue your green bean casserole and turn it into a culinary triumph.
Understanding the Culprit: Why is it Soupy?

When your green bean casserole turns out soupy instead of the creamy perfection you envisioned, it’s essential to understand the underlying reasons. This culinary conundrum can result from a combination of factors, and pinpointing the culprit is the key to rescuing your dish.
The Role of Green Beans
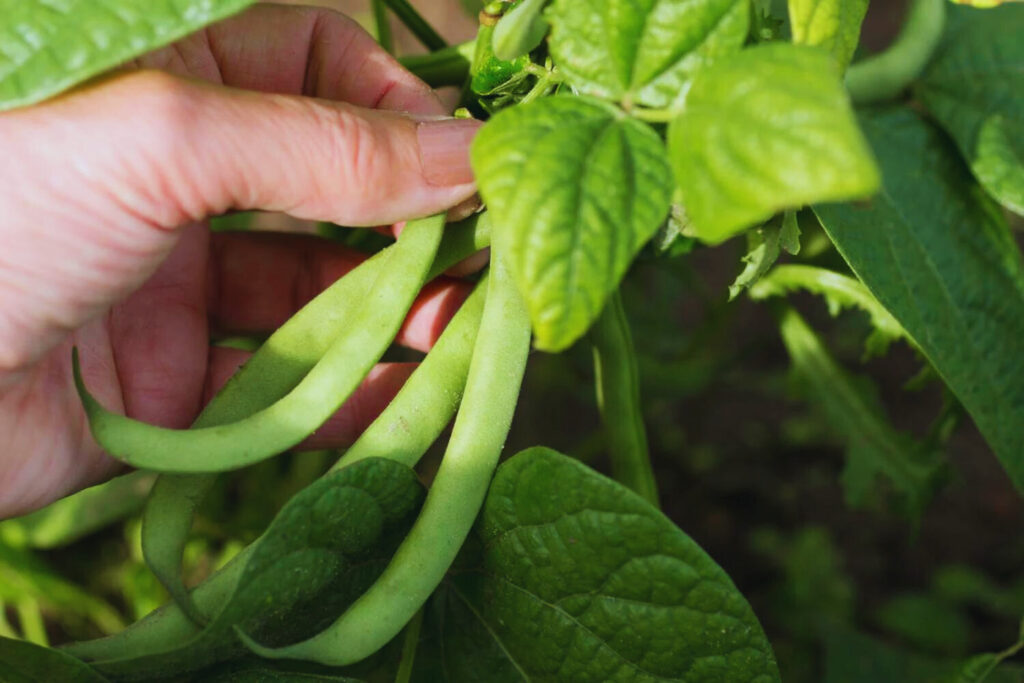
The choice of green beans plays a crucial role. Some varieties have a higher water content, leading to excess moisture in your casserole. Exploring different types and selecting the right one can make a significant difference.
Blanching Woes
Blanching, while necessary to achieve that tender-crisp texture, can contribute to sogginess if not done correctly. Timing is everything. Too short, and the beans remain tough; too long, and they release excess water into the casserole.
The Culprit in the Sauce
Examining the sauce is crucial. A runny sauce can turn your casserole into a watery mess. Factors such as using too much liquid or not incorporating thickening agents adequately can be the root cause.
Layering Matters
The order in which you layer your ingredients can impact the final result. If moisture-prone components are placed in the wrong sequence, your casserole may end up with an undesirable consistency.
Understanding these factors is the first step in rescuing your green bean casserole. In the upcoming sections, we’ll explore solutions to each issue, ensuring your next casserole is a culinary triumph.
Choosing the Right Green Beans: A Crucial Decision
In the quest for the perfect green bean casserole, your choice of green beans is a pivotal decision that can make or break the dish. Each type of green bean comes with its own set of characteristics, and selecting the right one can significantly impact the texture and overall appeal of your casserole.
Classic Green Beans
The traditional green bean, also known as string beans or snap beans, is a reliable choice. These beans offer a balanced texture, not too tender and not too firm. They are widely available and work well in most casserole recipes.
Haricots Verts
If you’re aiming for a more refined touch, consider using haricot verts. These French green beans are longer and thinner than their traditional counterparts, providing an elegant look and a slightly crisper bite.
Romano Beans
For those seeking a unique flavor, Romano beans are an excellent option. With a meatier texture and a slightly nutty taste, they add a distinctive twist to your casserole.
Frozen vs. Fresh
While fresh green beans are a go-to for many, don’t overlook the convenience and quality of frozen beans. Frozen beans are often flash-frozen at their peak, preserving their flavor and nutrients. Just ensure they are properly thawed and patted dry before use to prevent excess moisture.
Local and Seasonal Varieties
Exploring local and seasonal green bean varieties can be a delightful adventure. Visit farmers’ markets to discover fresh, in-season beans that can elevate your casserole with a burst of flavor and vibrancy.
Remember, the key is to consider the flavor, texture, and availability of the green beans. By making an informed choice, you set the stage for a green bean casserole that’s not only free from sogginess but also a culinary masterpiece.
Mastering the Art of Bean Blanching
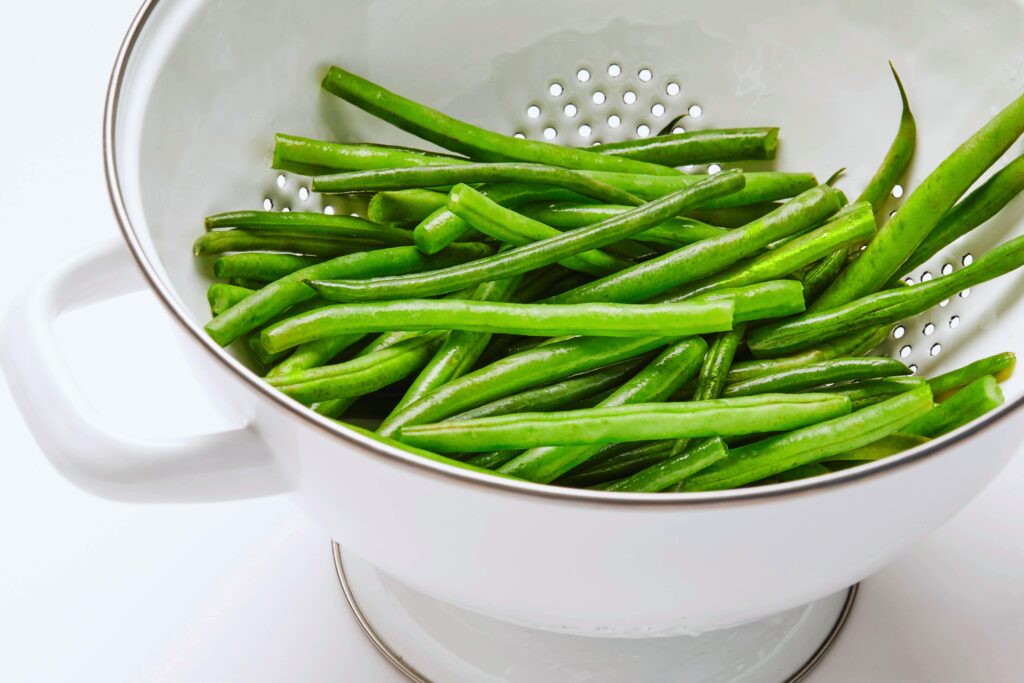
In the journey to rescue your green bean casserole from sogginess, mastering the art of bean blanching is a crucial skill. Blanching is the process of boiling vegetables briefly and then immediately cooling them in ice water. This technique is pivotal in achieving the perfect tender-crisp texture for your green beans without compromising their vibrant color and nutritional value.
The Steps to Perfect Bean Blanching
1. Prepare an Ice Bath
Before you start blanching, fill a large bowl with ice water. This will be your rapid cooling station for the beans after they’ve been boiled.
2. Boiling Water
Bring a pot of water to a rolling boil. Ensure there’s enough water to submerge the green beans fully. Add a generous pinch of salt to enhance flavor.
3. Trim and Sort
While the water is heating, trim the ends of the green beans and sort them by size. This ensures even cooking.
4. Blanching Time
Once the water is boiling, add the green beans. The key here is timing. Blanch small beans for about 2 minutes, medium beans for 3 minutes, and larger beans for 4 minutes.
5. Rapid Cooling
Immediately transfer the blanched beans to the ice bath. This halts the cooking process, preserving their crispness and color.
6. Drain Thoroughly
Once the beans are cool, drain them thoroughly. Excess water can lead to a soupy casserole, so pat them dry with a clean kitchen towel.
Tips for Perfect Bean Blanching
- Consistency is Key: Aim for uniformity in size to ensure even blanching.
- Watch the Clock: Stick to the recommended blanching times to avoid overcooking.
- Don’t Skip the Ice Bath: Rapid cooling is essential to lock in the desired texture and color.
- Test for Readiness: The beans should be vibrant, slightly tender, and still have a crisp bite.
Mastering the art of bean blanching sets the foundation for a green bean casserole that boasts the ideal balance of tenderness and crispness. In the next sections, we’ll explore how this skill, combined with other techniques, transforms your casserole into a culinary triumph.
The Thickening Agents: Your Allies Against Sogginess

To rescue your green bean casserole from the clutches of sogginess, employing effective thickening agents is your secret weapon. These agents not only add body and creaminess to your casserole but also prevent excess moisture, ensuring a dish that’s rich and satisfying.
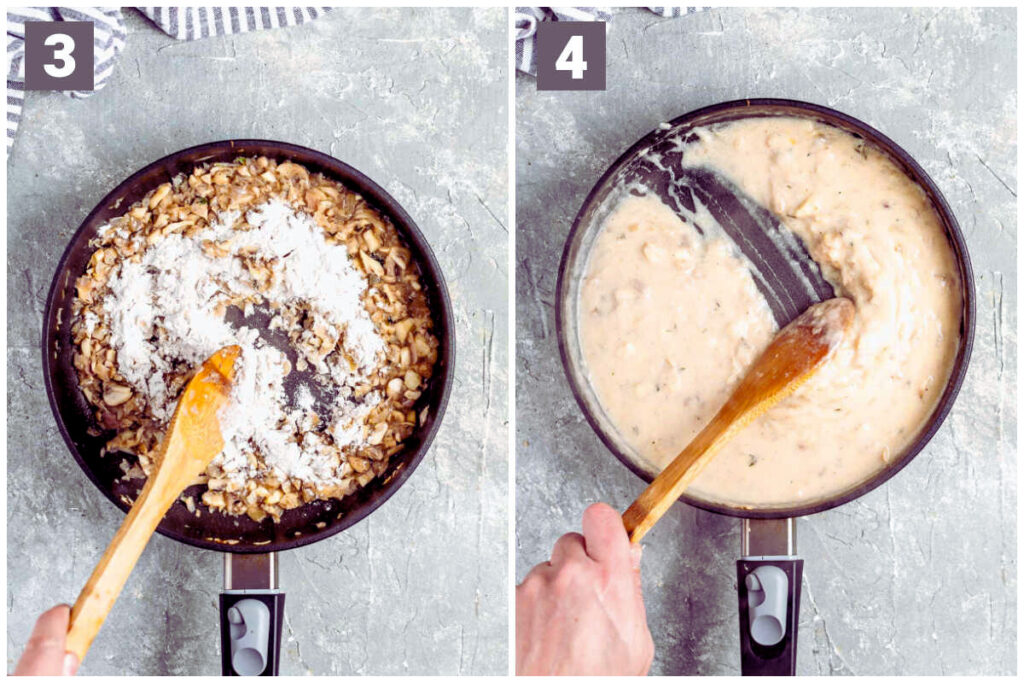
1. Classic Roux
A traditional and foolproof thickening agent, roux is a mixture of equal parts flour and fat (usually butter). Cooked to eliminate the raw flour taste, it serves as the base for a velvety sauce. Be mindful of the cooking time to achieve the desired thickness without compromising flavor.
2. Cornstarch Slurry
For a gluten-free option, turn to cornstarch. Create a slurry by mixing cornstarch with cold water before incorporating it into your sauce. This method ensures a glossy finish and a smooth texture.
3. Creamy Mushroom Soup
Elevate the flavor of your casserole by incorporating a can of creamy mushroom soup. Not only does it add richness, but the soup’s thick consistency contributes to the overall texture of the dish.
4. Greek Yogurt or Sour Cream
For a tangy twist, consider using Greek yogurt or sour cream. These dairy products not only thicken your casserole but also impart a delightful creaminess and a hint of acidity.
5. Cheese as a Double Agent
Cheese serves a dual purpose—it thickens and adds flavor. Opt for a blend of sharp and mild cheeses to create a luscious, cheesy sauce that binds your casserole together.
6. Nutritional Yeast
For a vegan alternative, nutritional yeast is a powerhouse. It not only thickens but also imparts a savory, umami flavor, mimicking the richness of dairy-based thickeners.
Tips for Effective Thickening
- Gradual Incorporation: Add thickening agents gradually, allowing you to control the consistency.
- Constant Stirring: Prevent lumps by stirring your sauce constantly, especially when adding flour or cornstarch.
- Adjust to Taste: Taste your sauce as you go and adjust the thickness according to your preference.
With these thickening agents as your allies, your green bean casserole is on the path to achieving the perfect consistency. In the upcoming sections, we’ll explore additional techniques to ensure your casserole is a masterpiece free from any unwanted fogginess.
Balancing the Creaminess: The Role of Dairy
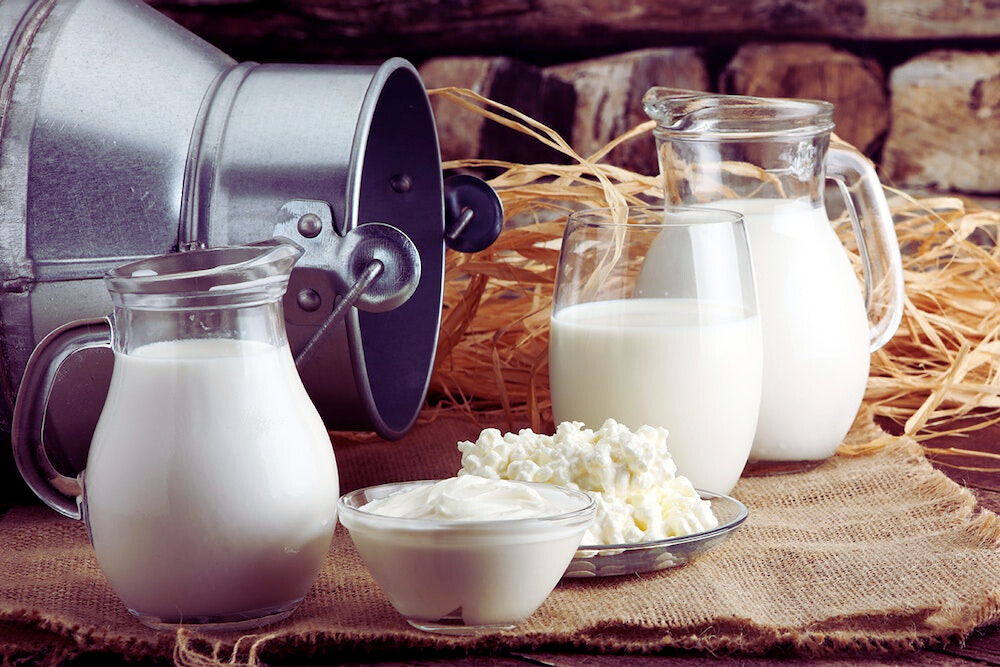
In the pursuit of rescuing your green bean casserole from sogginess, achieving the perfect balance of creaminess is paramount. Dairy plays a central role in elevating the texture and flavor of your casserole, transforming it into a culinary delight that’s both rich and satisfying.
1. Milk and Cream
The classic duo of milk and cream forms the foundation of a creamy sauce. Opt for whole milk and heavy cream for a luxurious texture. The combination adds a velvety smoothness that binds the ingredients together.
2. Evaporated Milk
For an extra boost of creaminess without the added liquid, consider using evaporated milk. Its concentrated form imparts a rich flavor without compromising the thickness of your casserole.
3. Cream of Chicken Soup
To infuse your casserole with a savory note, cream of chicken soup is a stellar choice. Its creamy consistency complements the green beans and contributes to the overall lusciousness of the dish.
4. Cream Cheese
For a tangy twist, incorporate cream cheese into your sauce. Not only does it add a velvety texture, but it also introduces a subtle tanginess that enhances the overall flavor profile.
5. Parmesan or Asiago Cheese
Add a layer of complexity to your casserole by including Parmesan or Asiago cheese. Grated finely, these cheeses melt seamlessly into the sauce, imparting a nutty richness.
6. Almond Milk or Coconut Milk
For those seeking dairy alternatives, almond milk or coconut milk can be excellent substitutes. They add a unique flavor while contributing to the creaminess of the sauce.
Tips for Achieving Creamy Perfection
- Temperature Control: Add dairy at room temperature to prevent sudden temperature drops that could result in curdling.
- Grated Cheese for Even Melting: Grate your cheese finely for quick and even melting into the sauce.
- Experiment with Ratios: Adjust the ratio of milk, cream, or alternative dairy to achieve the desired level of creaminess.
With these dairy options at your disposal, you’re well-equipped to strike the right balance of creaminess in your green bean casserole. In the next sections, we’ll explore additional techniques to ensure your casserole is a culinary masterpiece, free from any unwanted fogginess.
Layering Techniques: Building a Solid Foundation

As we venture further into the quest to rescue your green bean casserole from sogginess, mastering the art of layering becomes a crucial step. The sequence in which you arrange your ingredients plays a significant role in the texture and overall success of your casserole. Let’s explore the layering techniques that will ensure your dish stands on a solid foundation.
1. Begin with Green Beans
Start by laying down a foundation of blanched green beans. Distribute them evenly across the casserole dish, ensuring each bite offers a satisfying crunch.
2. Next Comes the Sauce
Pour a portion of your creamy sauce over the green beans. This not only infuses them with flavor but also sets the stage for a luscious and well-coated casserole.
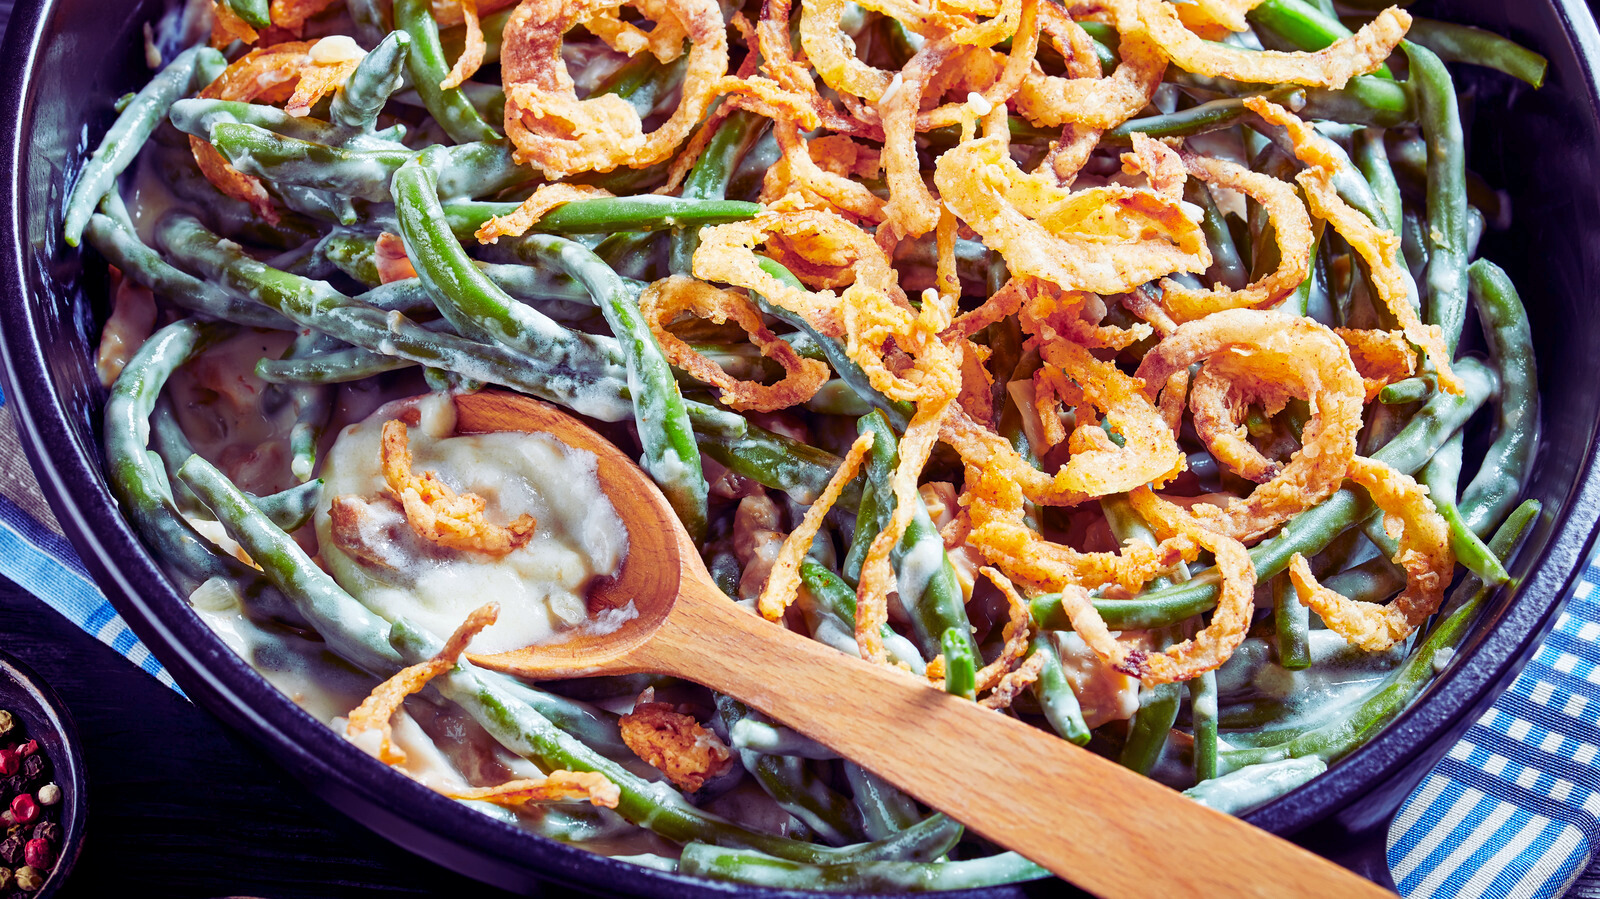
3. Add a Layer of Crunch
For added texture, sprinkle a layer of crispy fried onions or breadcrumbs. This layer not only provides a delightful crunch but also prevents the sauce from making direct contact with the green beans, minimizing fogginess.
4. Repeat the Layers
Repeat the process by adding another layer of green beans, followed by sauce and the crunchy topping. This creates a harmonious balance and ensures every spoonful is a perfect medley of flavors and textures.
5. Top with Cheese
For the finishing touch, generously sprinkle grated cheese over the top. This not only adds a golden crust when baked but also introduces a savory depth that ties the layers together.
Tips for Effective Layering
- Even Distribution: Ensure an even distribution of green beans, sauce, and toppings to create a cohesive dish.
- Mindful of Toppings: Use toppings strategically to maintain a balance between crunchiness and creaminess.
- Prevent Soggy Bottoms: Placing a layer of crunchy elements between the green beans and the sauce acts as a barrier, preventing fogginess.
By mastering these layering techniques, you’re on your way to building a solid foundation for your green bean casserole. In the upcoming sections, we’ll delve into additional insights to guarantee your casserole is a culinary triumph, free from any unwelcome fogginess.
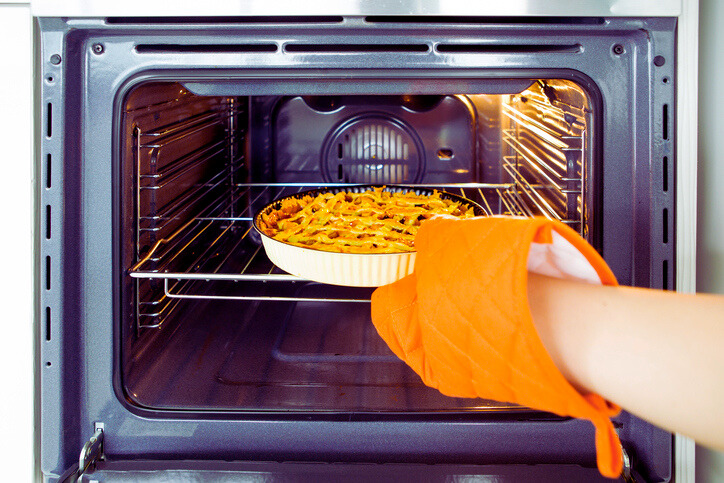
Baking Tips for Casserole Perfection
As we approach the final steps in rescuing your green bean casserole from sogginess, understanding the nuances of baking is crucial. Achieving a golden-brown crust while maintaining the ideal consistency within requires careful attention to temperature, timing, and technique. Let’s explore the baking tips that will elevate your casserole to perfection.
1. Preheat Your Oven
Ensure your oven is preheated before placing the casserole inside. A preheated oven sets the stage for even cooking and helps achieve that coveted golden crust.
2. Cover and Uncover Strategically
Cover the casserole with foil during the initial stages of baking to trap moisture and cook the ingredients thoroughly. Uncover for the last 10-15 minutes to allow the top to brown and crisp.
3. Temperature Control
Maintain a moderate oven temperature, typically around 350°F (175°C). This allows the ingredients to cook through without compromising the texture.
4. Avoid Overcrowding the Oven
If baking multiple dishes, avoid overcrowding the oven. Adequate space ensures proper air circulation, promoting even cooking.
5. Rotate the Casserole Dish
Halfway through the baking time, rotate the casserole dish. This simple step prevents uneven browning and ensures every corner of your dish receives equal attention.
6. Test for Doneness
To ensure your casserole is perfectly baked, insert a knife or toothpick into the center. It should come out clean, indicating that the ingredients are cooked through.
7. Let it Rest
Allow the casserole to rest for a few minutes before serving. This brief resting period allows the flavors to meld and ensures a cohesive texture.
8. Reheating with Care
If reheating leftovers do so in the oven at a low temperature. This maintains the integrity of the crust while ensuring the casserole’s interior is thoroughly warmed.
Tips for Casserole Baking Success
- Consistent Layer Thickness: Ensure uniform layer thickness to promote even baking.
- Check for Uneven Browning: If you notice uneven browning, cover the darker areas with foil while allowing the lighter areas to continue browning.
With these baking tips in mind, your green bean casserole is poised for culinary perfection. In the upcoming sections, we’ll explore additional strategies to ensure your casserole is a delectable masterpiece, free from any lingering fogginess.
The Role of Oven Preheating: Often Overlooked
In the pursuit of rescuing your green bean casserole from sogginess, one often overlooked yet crucial step is the preheating of the oven. The temperature at which you begin baking plays a significant role in the overall success of your casserole. Let’s unravel the importance of oven preheating and how it contributes to achieving culinary perfection.
1. Even Cooking from the Start
Preheating your oven ensures that the entire cooking chamber reaches the desired temperature before you introduce your casserole. This sets the stage for even cooking from the very beginning.
2. Consistent Texture Throughout
When the oven is preheated, the ingredients in your casserole start cooking immediately. This promotes a consistent texture throughout the dish, preventing any pockets of undercooked or overcooked elements.
3. Optimal Reaction of Ingredients
Certain reactions between ingredients, especially those involving leavening agents like baking powder or soda, begin as soon as the dish enters the preheated oven. This ensures that your casserole rises appropriately and achieves the desired texture.
4. Faster Cooking Time
A preheated oven reduces the overall cooking time. This is particularly crucial for ingredients like green beans, which benefit from a precise cooking duration to maintain their ideal tender-crisp texture.
5. Enhanced Maillard Reaction
Preheating contributes to the Maillard reaction—the chemical process responsible for browning and developing rich flavors. This reaction is vital for creating the golden-brown crust that distinguishes a perfectly baked casserole.
6. Preventing Sogginess
A preheated oven is instrumental in preventing sogginess. The rapid application of heat at the beginning of the baking process helps set the structure of the dish, minimizing the risk of excess moisture.
7. Energy Efficiency
Preheating your oven adequately ensures energy efficiency. Cooking in an oven that hasn’t reached the desired temperature can lead to longer cooking times, consuming unnecessary energy.
Tips for Effective Oven Preheating
- Plan Ahead: Factor in preheating time when planning your cooking schedule.
- Use an Oven Thermometer: Confirm that your oven has reached the set temperature with an oven thermometer for precision.
- Preheat for Baking and Roasting: Whether baking a casserole or roasting vegetables, always preheat your oven.
By acknowledging the significance of oven preheating, you’re taking a decisive step towards ensuring your green bean casserole emerges from the oven as a culinary masterpiece, free from the grip of sogginess. In the following sections, we’ll explore additional strategies to guarantee your casserole is a delectable delight.
Rescuing Overly Soupy Casserole: Quick Fixes

Even with the best intentions and culinary skills, an overly soupy green bean casserole can sometimes catch you off guard. Fear not! We’ve compiled a set of quick fixes to salvage your casserole and transform it into a delightful dish. Let’s explore these easy remedies for rescuing an overly soupy situation.
1. Increase Oven Time
If your casserole appears too soupy, extend the baking time. This allows excess moisture to evaporate, resulting in a thicker and more cohesive texture.
2. Add a Thickening Agent
Introduce a thickening agent to absorb excess liquid. Options include flour, cornstarch, or arrowroot. Mix the chosen agent with a small amount of water before incorporating it into the casserole.
3. Top with Crunchy Toppings
Sprinkle additional crunchy toppings, such as breadcrumbs or crispy fried onions, over the casserole. These absorb moisture and add a delightful texture.
4. Reheat with Foil
If reheating leftovers, cover the casserole with foil to trap moisture during the initial stages of heating. Uncover for the last few minutes to allow the top to crisp up.
5. Separate and Reheat
If possible, separate the solid components from the liquid. Reheat the solid components in the oven to maintain their texture, and adjust the consistency of the sauce separately.
6. Drain Excess Liquid
Carefully drain excess liquid from the casserole using a ladle or spoon. This simple step can instantly alleviate fogginess.
7. Use Absorbent Ingredients
Incorporate absorbent ingredients like additional breadcrumbs, rice, or quinoa. These ingredients can soak up excess moisture, contributing to a drier casserole.
8. Rebalance with Vegetables
If the green beans are the source of excess moisture, rebalance the dish by adding more roasted or sautéed vegetables. This not only absorbs liquid but also enhances flavor.
9. Adjust Seasonings
Enhance the overall flavor of your casserole by adjusting the seasonings. A well-seasoned dish can distract from minor textural issues.
10. Thicken with Dairy
Consider adding a dairy-based thickening agent, such as more cheese or a dollop of sour cream. These not only contribute to thickness but also enhance the richness of the casserole.
Tips for Quick Fixes
- Gradual Adjustments: Add thickening agents gradually and adjust consistency as needed.
- Taste as You Go: Regularly taste the casserole and adjust the seasoning to ensure a balanced flavor.
With these quick fixes at your disposal, rescuing an overly soupy green bean casserole becomes a manageable task. In the following sections, we’ll explore additional strategies to ensure your casserole is a triumph, free from any lingering fogginess.
Flavor Enhancements: Elevating Your Casserole Game
In the journey to rescue your green bean casserole and elevate it to new culinary heights, focusing on flavor enhancements is a key strategy. Beyond the texture, infusing your dish with a rich and well-balanced taste ensures a memorable dining experience. Let’s explore creative ways to enhance the flavor profile of your casserole and transform it into a gastronomic delight.
1. Fresh Herbs for Vibrancy
Introduce fresh herbs to add vibrancy and complexity to your casserole. Parsley, thyme, or rosemary can bring a burst of freshness and elevate the overall flavor.
2. Garlic and Onions for Depth
Enhance the depth of flavor by incorporating minced garlic or sautéed onions. These aromatic ingredients contribute savory notes that complement the creamy base.
3. Citrus Zest for Zing
Brighten up your casserole with a hint of citrus zest. Lemon or orange zest adds a zing that cuts through the richness, creating a well-balanced taste.
4. Spice It Up with Cayenne or Paprika
For a subtle kick, consider adding a pinch of cayenne pepper or smoked paprika. These spices impart a smoky warmth that elevates the overall flavor profile.
5. Worcestershire Sauce for Umami
A dash of Worcestershire sauce can introduce a layer of umami, enhancing the savory character of your casserole. Start with a small amount and adjust to taste.
6. Dijon Mustard for Tang
Incorporate Dijon mustard for a tangy kick. Its sharpness adds complexity to the dish and complements the creaminess of the sauce.
7. Balsamic Glaze for Sweetness
For a touch of sweetness, drizzle a balsamic glaze over the casserole before serving. The sweet and tangy notes provide a delightful contrast.
8. Nutty Crunch with Toasted Almonds
Toast slivered almonds and sprinkle them over the casserole. The nutty crunch not only adds texture but also introduces a subtle richness.
9. Bacon Bits for Savory Delight
For a savory twist, consider adding crispy bacon bits. The smokiness and saltiness of bacon can transform your casserole into a flavor-packed dish.
10. Dried Herbs for Intensity
If fresh herbs are unavailable, dried herbs such as oregano, basil, or thyme can be equally potent. Just use them sparingly, as their flavors are concentrated.
Tips for Flavorful Success
- Balance the Elements: Ensure a harmonious balance between savory, sweet, tangy, and umami elements.
- Experiment Gradually: Introduce new flavors gradually, tasting as you go to avoid overwhelming the dish.
- Consider Your Audience: Tailor the flavor enhancements to suit your audience’s preferences.
With these flavor-enhancing techniques, your green bean casserole is poised to become a culinary masterpiece. In the following sections, we’ll continue to explore additional strategies to guarantee your casserole is a delectable delight.
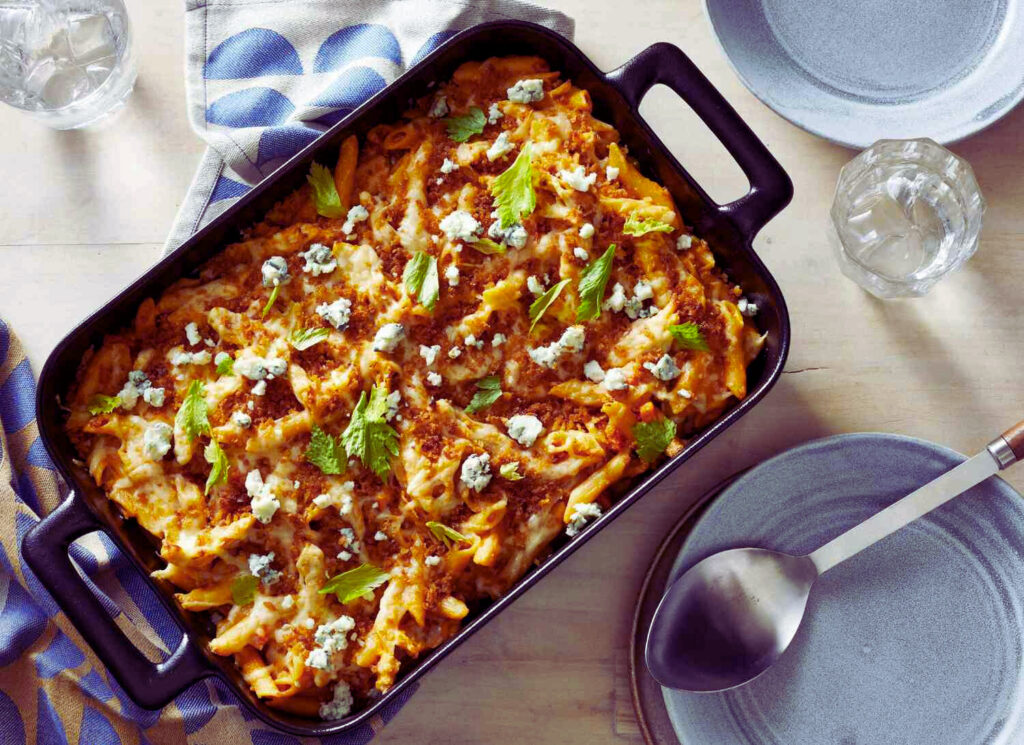
How To Fix Soupy Green Bean Casserole: A Step-by-Step Guide
If you’ve found yourself facing the common kitchen dilemma of a soupy green bean casserole, fear not! With a few strategic steps, you can rescue your dish and transform it into a culinary triumph. Follow this step-by-step guide to bring your green bean casserole back to perfection.
1. Assess the Consistency
Before taking any action, evaluate the consistency of your casserole. Determine if it’s overly soupy or if there’s just a slight excess of moisture. This initial assessment guides your approach to fixing the issue.
2. Increase Oven Time
If your casserole is excessively soupy, return it to the oven. Bake at the original temperature for an additional 10-15 minutes, allowing the excess moisture to evaporate. Keep a close eye on the texture during this process.
3. Add a Thickening Agent
Introduce a thickening agent to absorb excess liquid. Mix 1-2 tablespoons of flour, cornstarch, or arrowroot with a small amount of water to create a slurry. Gradually incorporate the slurry into the casserole, stirring continuously to avoid lumps.
4. Top with Crunchy Toppings
To absorb excess moisture and add texture, sprinkle additional crunchy toppings over the casserole. Breadcrumbs, crispy fried onions, or toasted almonds work wonders. Ensure an even distribution for balanced flavor and consistency.
5. Reheat with Foil
If reheating leftovers, cover the casserole with foil during the initial stages of heating. This traps moisture and aids in redistributing it throughout the dish. Uncover for the last few minutes to allow the top to crisp up.
6. Separate and Reheat
If possible, separate the solid components from the liquid. Reheat the solid components in the oven to maintain their texture, and adjust the consistency of the sauce separately.
7. Drain Excess Liquid
Carefully drain excess liquid from the casserole using a ladle or spoon. This simple step can instantly alleviate sogginess and restore the desired texture.
8. Use Absorbent Ingredients
Incorporate absorbent ingredients like additional breadcrumbs, rice, or quinoa. These ingredients can soak up excess moisture, contributing to a drier casserole.
9. Rebalance with Vegetables
If the green beans are the source of excess moisture, rebalance the dish by adding more roasted or sautéed vegetables. This not only absorbs liquid but also enhances flavor.
10. Adjust Seasonings
Enhance the overall flavor of your casserole by adjusting the seasonings. A well-seasoned dish can distract from minor textural issues.
11. Serve Immediately
Once you’ve made the necessary adjustments, serve your green bean casserole immediately. The optimal texture and flavor are best experienced right out of the oven.
By following these step-by-step instructions, you can rescue your soupy green bean casserole and present a dish that’s not only visually appealing but also a delight to the taste buds. In the next sections, we’ll continue to explore additional strategies to ensure your casserole is a delectable masterpiece, free from any lingering sogginess.
Conclusion
Armed with these insights and tips, you’re now equipped to rescue any soupy green bean casserole. Turn kitchen mishaps into culinary victories and delight your guests with a flawlessly executed dish.
Read also: How to Get Periods Overnight: Unveiling Nature’s Secrets
FAQs
Q: Can I use frozen green beans for my casserole?
Absolutely! Frozen green beans can work wonders. Ensure they are properly thawed and patted dry before use to prevent excess moisture.
Q: What if my casserole is too dry instead?
Adjust the thickness of your sauce or add a splash of broth to achieve the desired consistency. The key is to proceed gradually.
Q: Can I prepare the casserole in advance?
Certainly! Prepare the components in advance and assemble just before baking for a fresh and delightful outcome.
Q: Is there a dairy-free alternative to achieve creaminess?
Yes, coconut milk or almond milk can be excellent dairy alternatives, providing both creaminess and a unique flavor.
Q: Can I add meat to my green bean casserole?
Absolutely! Crispy bacon or shredded chicken can add a savory twist to your casserole. Adjust cooking times accordingly.
Q: How do I prevent a rubbery texture in my green beans?
Ensure you blanch the green beans for the optimal time—neither undercooked nor overcooked. This guarantees a perfect texture.